
Step by step: Hide company and group
1. Create a company group
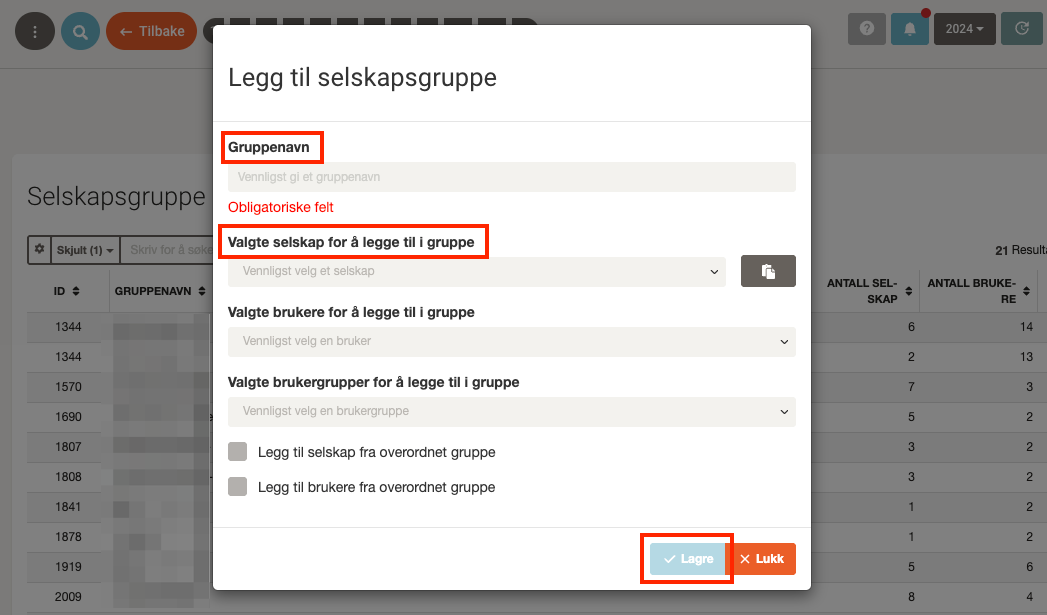
- Go to Group under Settings & Admin in the menu on the left.
- Click + Add group.
- Give the group a name, and select the company you want to hide from the dropdown menu.
- Finish by clicking Save.
2. Grant access to users
Choose one of these methods to grant access:
- Add individual users directly to the company group.
- Select an existing user group and add it to the company group.
- Create a new user group and add it to the company group.
3. Make the group hidden
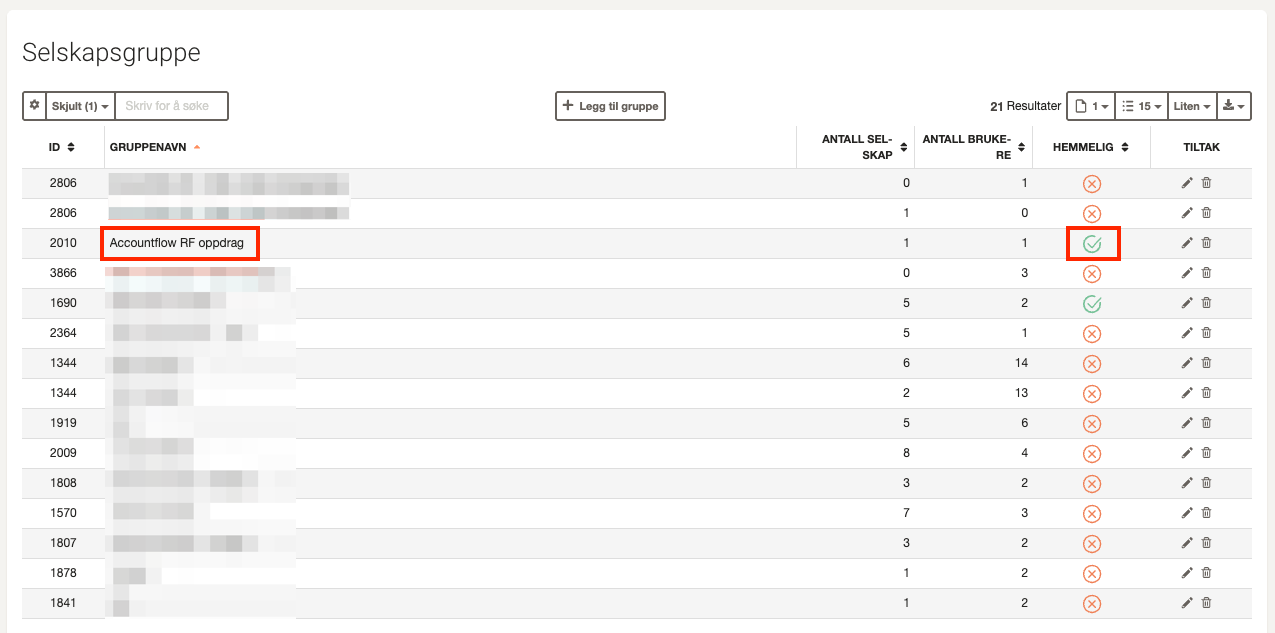
- In the list of company groups, click the cross in the Secret column for the relevant company group.
- When the icon changes to a green check mark, the group is hidden from all users without access.
4. Make the company hidden
- Go to Company under Setup & Admin in the menu on the left and find the company you want to hide.
- Click the cross in the Hidden column, just like in the previous step.
- When both the group and the company have a green check mark in the Hidden column, they are hidden from all users without access.
5. Verify that hiding is active
- You will also receive a confirmation on the screen: “Secret field updated successfully.”
Tips
- A company is only visible to users who are added to a company group where both the group and the company are set as hidden.
- Use groups to simplify access management if multiple users should have the same permissions.