
Step by step: Connect Unimicro
1. Activate the Accountflow integration in Unimicro
- Go to the Marketplace in Unimicro and select Integrations.
- Find Accountflow in the list and activate the integration.
- If you need more help in Unimicro, see their guide: Activate integrations (in Norwegian)
2. Add the company in Accountflow
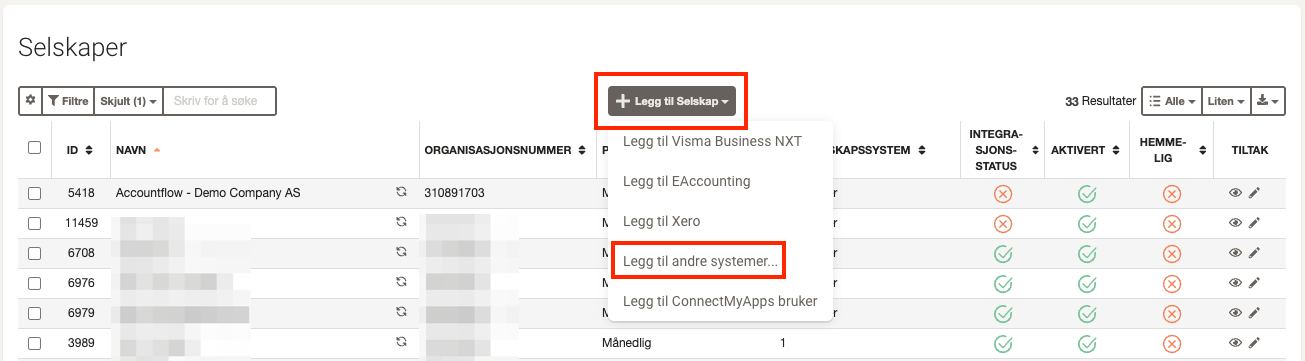
- Go to Company under Setup & Admin in the menu on the left.
- Click Add company.
- Choose Add other systems from the dropdown menu.
3. Enter company details
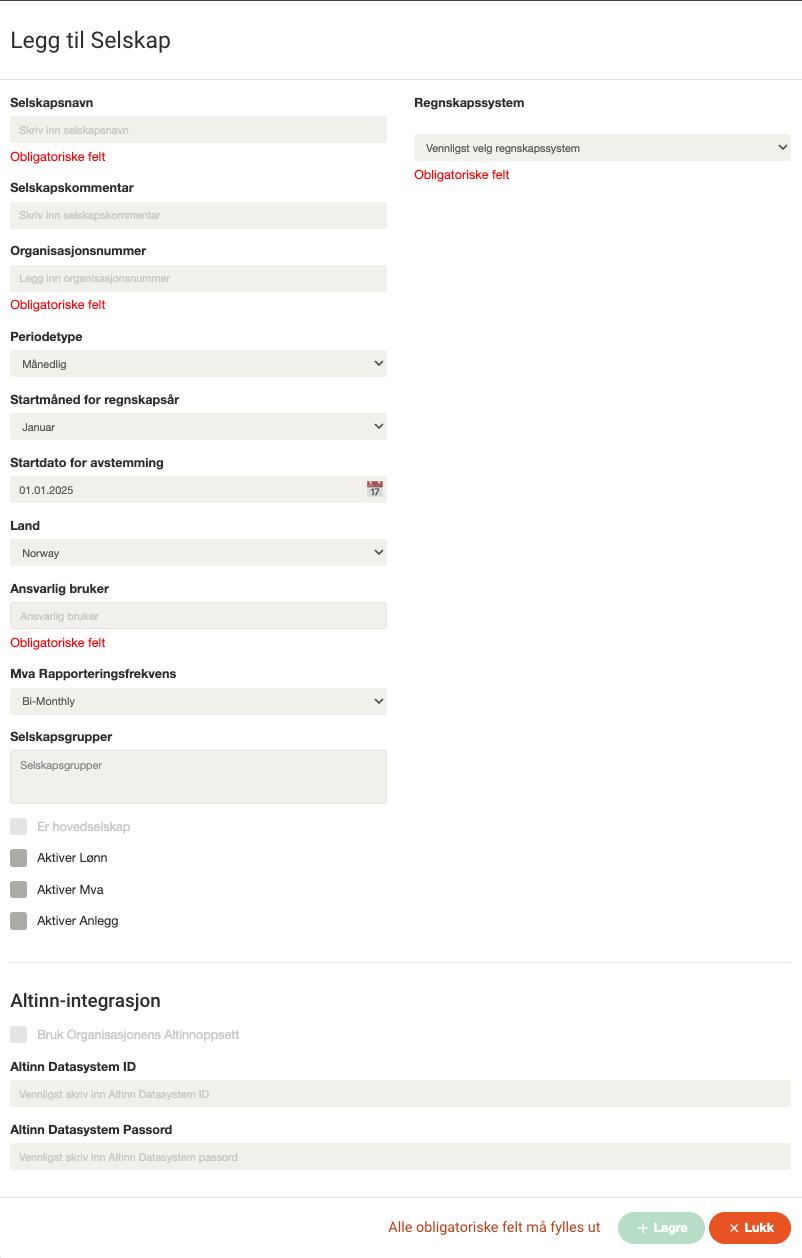
- Company name
- Company comment (optional internal note)
- Organization number
- Period type (e.g., monthly reconciliation)
- Start month for the financial year (if deviating)
- Start date for reconciliation (controls start of data retrieval including A07 messages)
- Responsible user (who will own the reconciliation)
- VAT reporting frequency
- Company groups (if applicable)
- Tick any modules you wish to activate: Payroll, VAT, Assets
4. Select accounting system
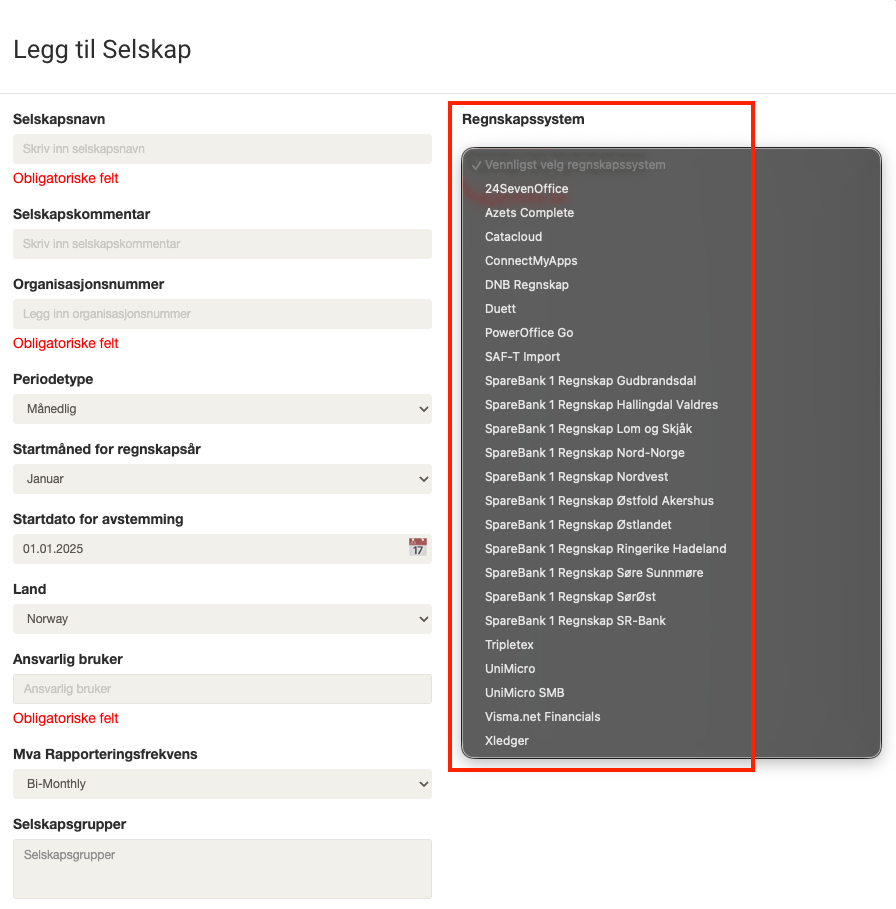
- Select the desired accounting system from the dropdown menu.
- The Unimicro integration applies to the following systems:
- Azets Complete
- DNB Regnskap
- SpareBank 1 Regnskap (alle varianter)
- Unimicro
- Unimicro SMB
5. Save the setup
- You don’t need a key or any extra validation in Accountflow.
- Click Save to complete the company setup.
💡 Note that it can take up to 24 hours before the integration is fully operational.