
💡 It is not possible to change the accounting system on an existing client in Accountflow, as this would delete all reconciliations. Instead, you must create a new client with the desired system. See how-to-guides for the different systems in the collection Setup & Integrations.
Step by step: Change accounting system
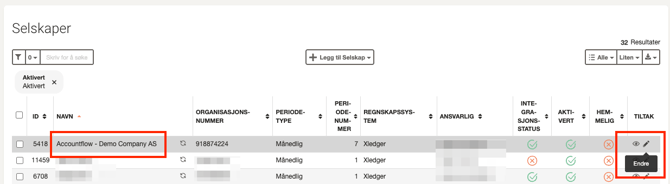
1. Edit the existing company
- Go to Company under Settings & Admin in the menu on the left.
- Click the pencil icon in the Actions column for the relevant company.
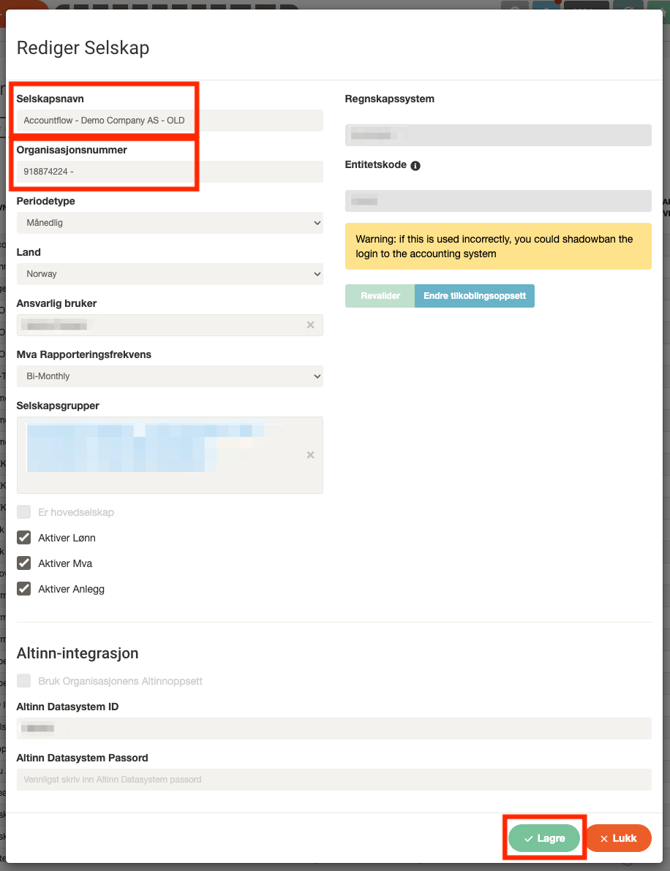
2. Change name and organization number
- Change the name to e.g. Company name – OLD to distinguish the old client from the new one.
- Add a dash after the organization number. This prevents the system from retrieving new a-messages for the old client.
- Finish by clicking Save.
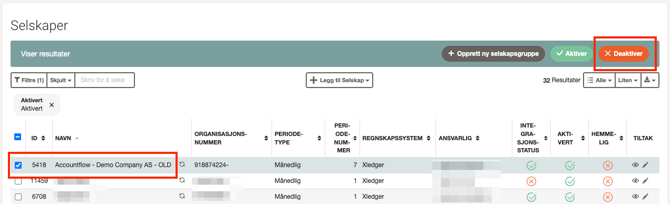
3. Deactivate the old client (optional)
- Go back to Company under Settings & Admin.
- Select the company in the list and click Deactivate in the top right.
💡 If users without Super Admin access should still be able to see the old client, you should not deactivate it.
4. Create a new client with the correct system
- Create a new client with the desired accounting system.
- Follow the guide: How to set up a new company
Tips for transferring data
- Download report packages from the old client before deactivating it, so you have documentation available.
- Copy manual settings such as groups, users, and accounts if they should be reused.
- Import history with SAF-T if the new accounting system supports export. This way, you can include past vouchers and balances.
- Compare the clients manually to ensure everything is included in the new setup.
💡 There is currently no transfer function between clients, but you can retrieve the most important data manually.